Importing Genesys Cloud to SharePoint via Power Apps
An In-Depth Tutorial on Building Flows and Managing Call Center Data in Microsoft SharePoint
Take a Product Tour
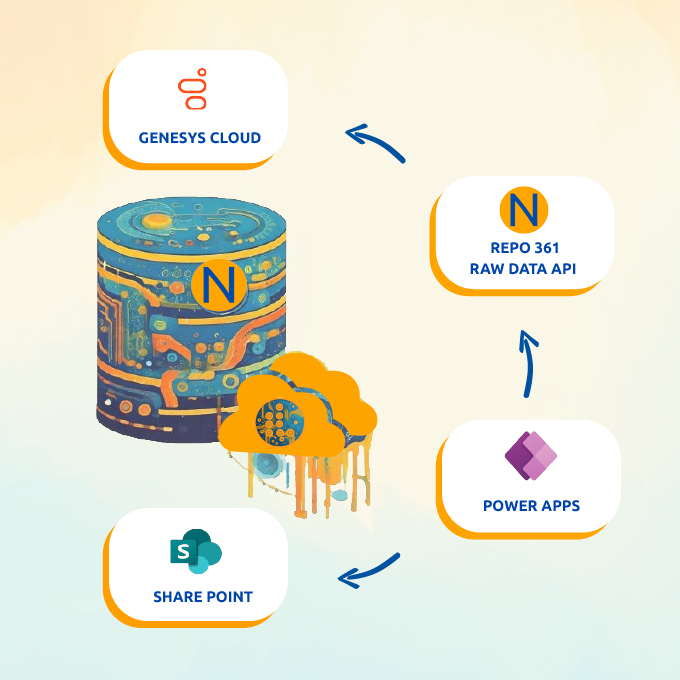
Microsoft Power Apps platform is a very flexible technology for low-code development and integration. At Noralogix, we have a variety of internal apps designed based on the Power Apps Platform. For us, it’s a tool for fast prototyping and integration between multiple Microsoft services. We have the Genesys Cloud Raw Data API. This API provides you with the entire call center data. Just a single HTTP request provides you with a list of CSV files. You don’t need to deal with multiple Genesys Cloud API requests; Noralogix provides you with everything possible. You can import all files to your machine with a PowerShell script if you want to run it on-prem VM. Or you can design a simple app and import all files. This time we are going to import data into a Microsoft SharePoint directory. This is a case where the Power Platform will be the best option in terms of implementation and easy deployment.
How to Deal with Raw Data API with Power Apps:
- Login to Power Apps.
- Go to the Solutions Section.
- Create a New Solution.
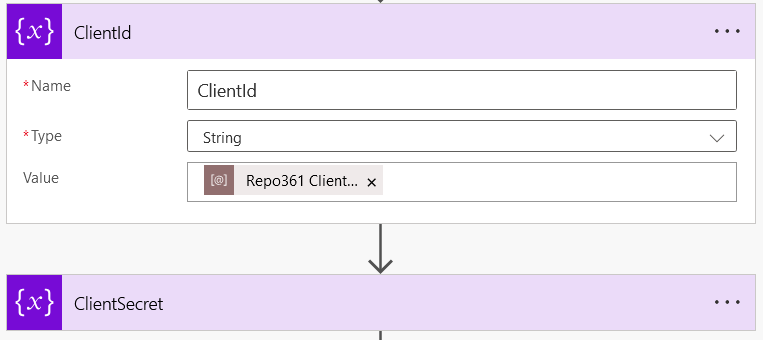
- Define Environment Variables: Repo361 Client Id and Repo361 Client Secret. Instructions on how to create secrets should be followed.
- Create a New Flow:
Flow contains multiple activities.
In our case, every day at 7 AM, we will upload the Genesys Cloud CSV file to a SharePoint directory. The first activity will be “Recurrence” which runs at 7 AM every day.

We need to initialize multiple variables: ClientId, ClientSecret from environment variables.
TimeZone – your organization's time zone; this is important for correct data extraction.

RawDataDate – date of raw data extraction, an API parameter, set as the current org date minus 2 days, in API format yyyyMMdd.

This value will be calculated in such a way: formatDateTime(addDays(convertFromUtc(utcNow(), outputs('TimeZone')), -2), 'yyyyMMdd')
current org date – 2 days.
RawData API Requests:
When all variables are ready, we can start with API requests.
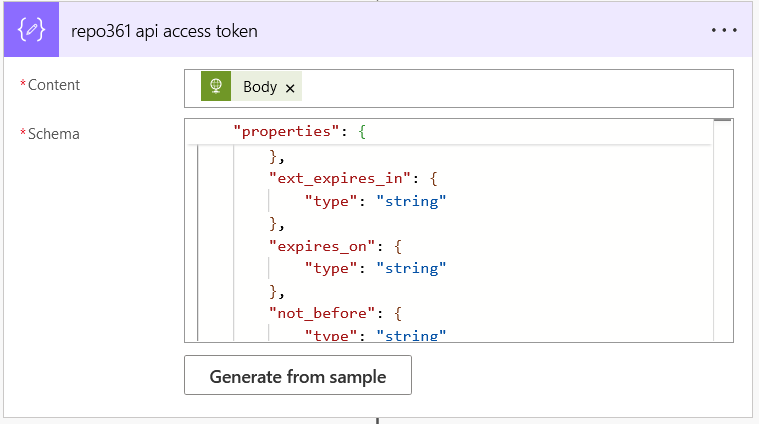
The first request is to get the API access token: https://api.repo361.com/security/oauth2/token
Specify the header value: "Content-Type" = "application/x-www-form-urlencoded"
Body: concat('grant_type=', encodeUriComponent('client_credentials'), '&client_secret=', encodeUriComponent(variables('ClientSecret')), '&client_id=', encodeUriComponent(variables('ClientId'))).

Parse the response result into a Power Apps object.
Send a GET API request
https://api.repo361.com/rawdata/files/@{variables('rawdataDate')}/csv
Specify the header value: "Authorization" = "Bearer @{body('repo361_api_access_token')?['access_token']}".
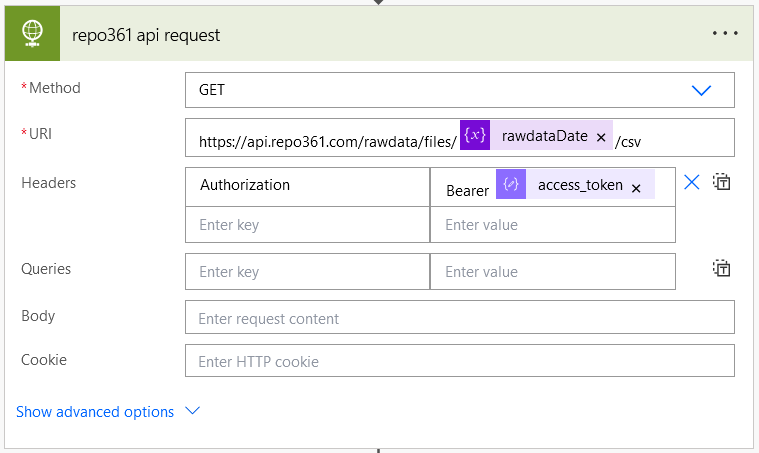
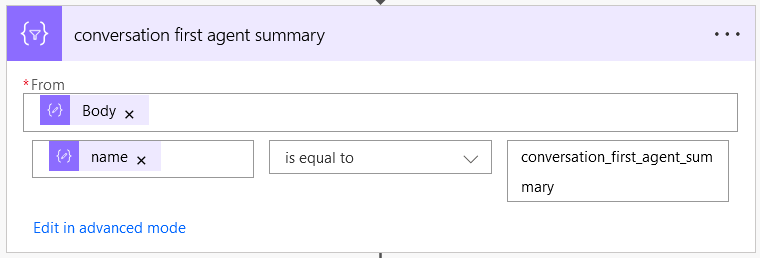
The response is a collection of CSV files with properties name and URL.

You can filter and load just the specific file. In our case, it will be conversation_first_agent_summary.
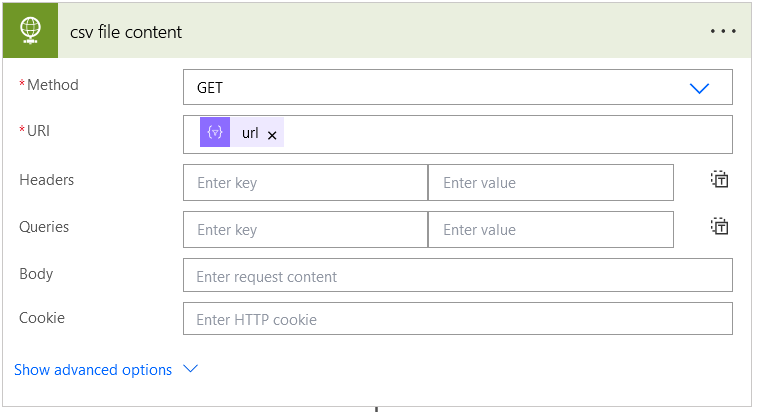
Download and Upload File:
It is very important to download the file before pushing it to SharePoint. Send a GET request with the CSV URL.
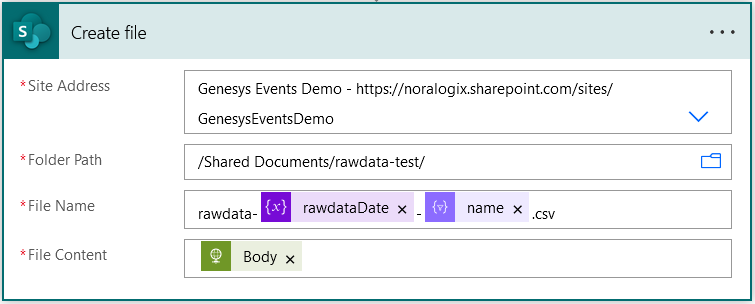
Create a file under SharePoint.
Schedule a call.
Book a call with the Noralogix team. We look forward to talking to you.